
Do you want to start an online store?
Starting an online store can be a tedious task, especially for a beginner or non-tech user.
But if you are guided with the proper steps of building an online store, then it’s not as hard as people say.
This article will help you to build an online store step-by-step. Let’s get to it.
What Do You Need To Start An Online Store?
Here’s a list of all the things you’ll need to create your eCommerce website and start selling:
- A fancy computer with top-notch specifications
- A degree in Computer Science
- A Certificate Course in Web Development
- Loads of money and time to acquire them all
You know I am kidding, right? Yes, you don’t need all of that and as promised you only need a computer, this article, and three things.
What are the three things to start an eCommerce website?
1. Domain Name
A domain name is the unique identity of your online store. It should be the name of your business preferably or the acronym of it.
2. Web Hosting
You will require web hosting for your website which provides space to save and display your files on the internet. It is a storage space that you need to upload your website.
3. Time
30 minutes is all you need for creating a website to sell products online.
At this point, you might be thinking that if it is that simple, why is everyone else not doing it? Well, I don’t know the answer for sure. Maybe they haven’t met us or simple procrastination, what do you say?
So let’s get started with the process of answering, “How to start an online store?”.
Step 1 – Register Domain Name For Your eCommerce Store
In this article, we have talked before that we need to have three things to build an eCommerce store – domain, hosting, and some time. We discussed what domain and hosting services are, let’s find out how to get ours.
How to Register a Domain Name?
NameCheap is a familiar name when it comes to buying a new domain name. They provide competitive prices and they often run discount offers to get your first domain name at a fair price.
NameCheap is used by big brands like Figma, Imgur, etc. that’s why we trust NameCheap for us. You can also go to NameCheap.com and find the perfect domain name for your online store.
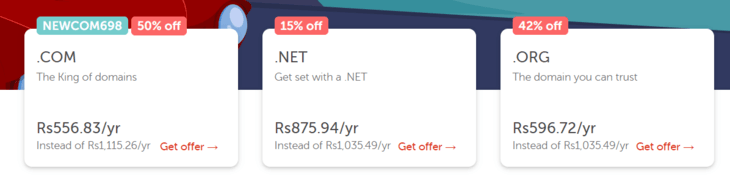
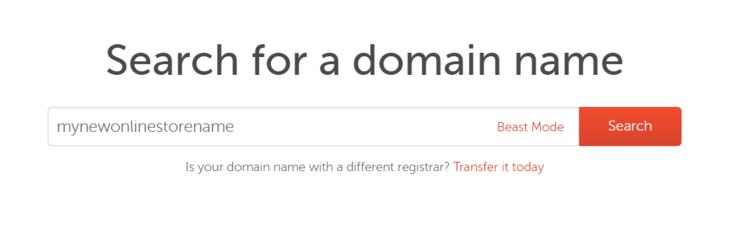
To book your domain name with NameCheap go to their website and search for your desired domain name.
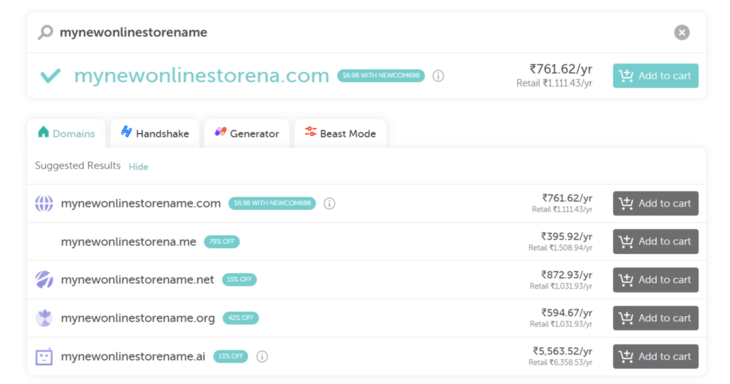
Then select all the domain extensions you want to register for your online store.
Get an SSL Certificate For Website Security
Don’t forget to include an SSL Certificate with your domain name. SSL makes your website secure and trusted for users.

Click on Checkout and complete your signup process and pay for your order.
And that is how you took your second step to make your online store come true (the first was to open this article).
Step 2 – Get Web Hosting
We recommend CloudWays for your hosting requirements. Go to their website and select a plan according to your preferences.
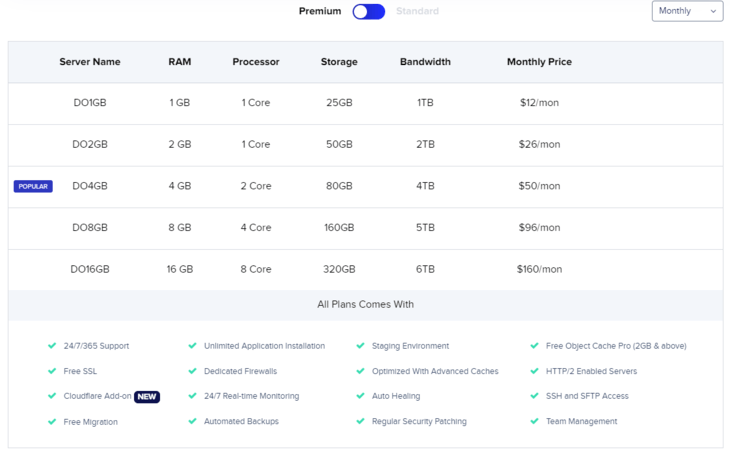
We recommend you get the DO2GB plan for starting up. You can always upgrade as and when required. Cloudways offer you a 3-day trial free of cost without a credit card, so get that if you want to try it out.
Now that we have purchased domain and hosting from two different service providers, we’ll have to link our domain and hosting to make our website work.
Step 3 – Choosing the Right eCommerce Platform For Your Online Store
Choosing the right platform is of utmost importance when we create an eCommerce website.
In this day and age, many platforms can help you set up your online store. We’ll talk about the most popular 3 in this section.
1. WordPress + WooCommerce
WordPress, as we know, is a completely free Content Management System. For a WordPress website to function as an eCommerce store, we’ll need a plugin called WooCommerce.
WordPress comes with a ton of customizations, themes, plugins, and a lot more that can help you build your online store with utmost ease.
We’ll cover WordPress in this article, but just so that we don’t look like undercover agents of WordPress, we’ll talk about two other platforms also.
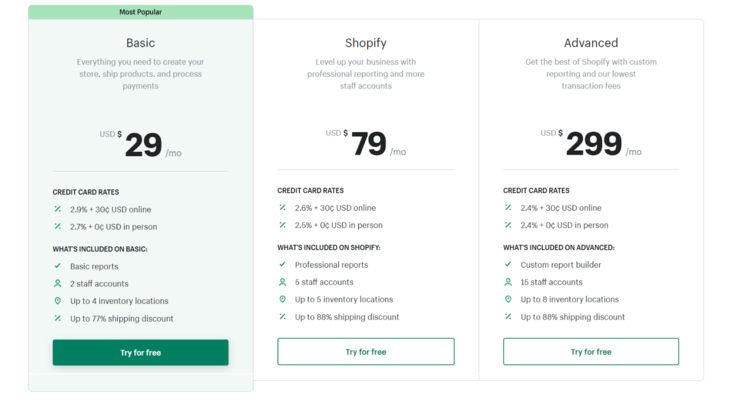
2. Shopify
Shopify is a very big name when it comes to setting up an online store. Shopify is all about eCommerce and selling.
It comes with all tools to fast forward your journey in the online world, but it comes at a cost.
The cost incurred at running an online store at Shopify can become a deterring factor for most.
3. BigCommerce
BigCommerce is another eCommerce platform like Shopify. It is a SaaS (Software as a Service) company. You need to pay a certain fee to access it.
You do not need separate web hosting or any other software to run it. Many people say it has a ton of functionality, but that is also what makes it complex for beginners.
Step 4 – Install WordPress & Setup WordPress
Now that we are all sorted with our shopping and integration. It is now time to set up our WordPress eCommerce store.
First thing first! The name and tagline of your business. For that, you need to visit Settings → General to change these.
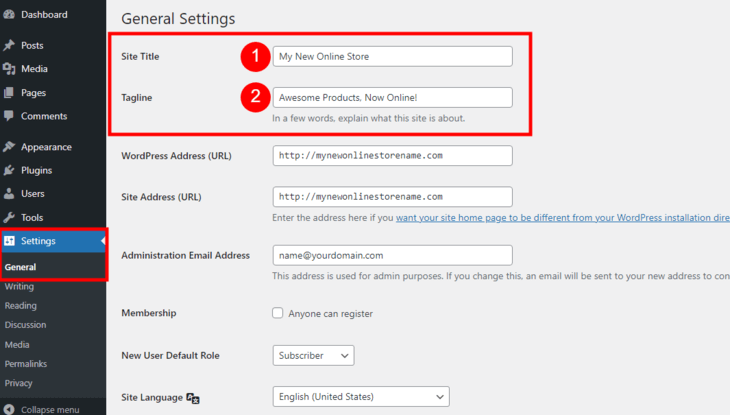
Use your Business name and your motto or tagline here to reflect the same values you are aligned with.
Setting Up HTTPS To Use SSL
Remember that SSL add-on that we purchased with our domain. Now to use that we have to configure our website to use it.
On the same page as the site title and tagline below you will see the WordPress Address and Site Address. Put an ‘s’ after HTTP in both of them.
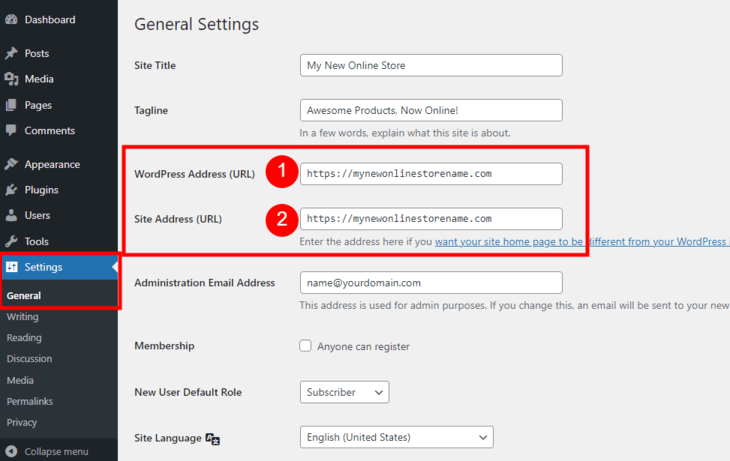
Scroll to the bottom of this page and click ‘Save Changes’.
Step-5 – Choosing The Right Theme For Your Store
Now that we have done the basic WordPress setup, let’s pick the right theme for your online store. Wait I haven’t told you what a WordPress theme is. What’s the big deal? Let me tell you now.
What is a WordPress Theme?
A WordPress theme gives your website the look and feels you want it to. It is a tool or says a set of files with technical jargon words (Style Sheets, lots of codes, graphics, etc.).
It is the fabric for the final product as WordPress allows a ton of customizations even after selecting a theme.
Choosing & Installing Astra WordPress Theme for WooCommerce Store
In this article, we will use the Astra WordPress theme because it is very lightweight, highly customizable, and WooCommerce optimized. Hundreds of thousands of websites trust Astra for their website.
Let’s install the Astra WordPress theme. For that, you need to go to Appearance → Themes, click on Add New, and search for Astra in the search box.
When you locate Astra, click on Install. After the theme is installed, click Activate.
Don’t overwhelm yourself and think this is too technical. Just follow along and you’ll do good.
Now that we are just starting we can take the help of some pre-built templates for our eCommerce store.
Step-6 – Install Essential WordPress Plugins For Your Store
For our online store to function as we want it to, we need some basic plugins. Here are the three most important plugins to transform your normal website into an eCommerce website.
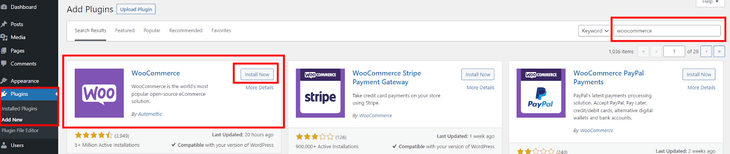
1. WooCommerce
WooCommerce plugin for WordPress is an eCommerce platform plugin. It lets us build our online store very quickly. So let’s see how to install the WooCommerce plugin.
First, go to Plugins → Add New. Search for WooCommerce and press install.
We’ll set up the WooCommerce plugin in the later part of this Article.
2. Yoast SEO
Yoast SEO will help your online store rank better on search engines, like Google, Bing, etc. Yoast SEO plugin for WordPress has many tools and features to make your business and products searchable on the internet.
It satisfies all your SEO (Search Engine Optimization) related needs in one place.
3. Sucuri
We all require security while being online. Your online store is no exception. It needs security from hackers that can send some seriously damaging malware for their own gains.
Nobody wants that, so we will need a security system in place, and that is when the Sucuri plugin for WordPress comes in. It helps you to secure and audit activities on your online store, malware scanning, firewall, and much more.
You can install both of these plugins the same way we installed WooCommerce. After the installation is complete, click on Activate. Do it in this order first activate Yoast SEO, then Sucuri, and finally activate WooCommerce.
Step-7 – Setting Up Your WooCommerce Store
We installed the WooCommerce plugin on our online store website, now let’s set it up so that we can get our online store up and running.
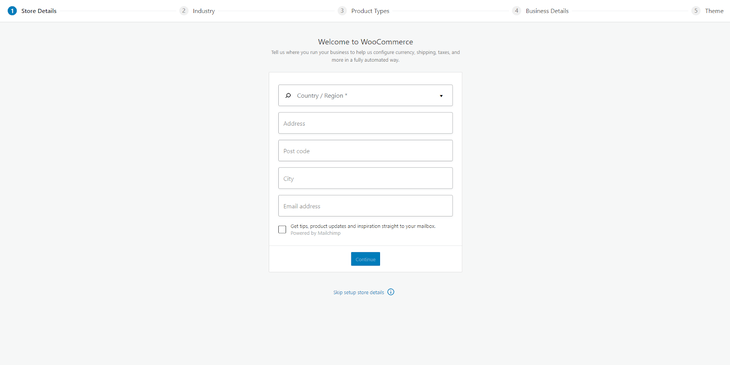
1. Activate WooCommerce Plugin
After activating the WooCommerce plugin, you will see this window. Fill in the required details and click Continue at the bottom of the page.
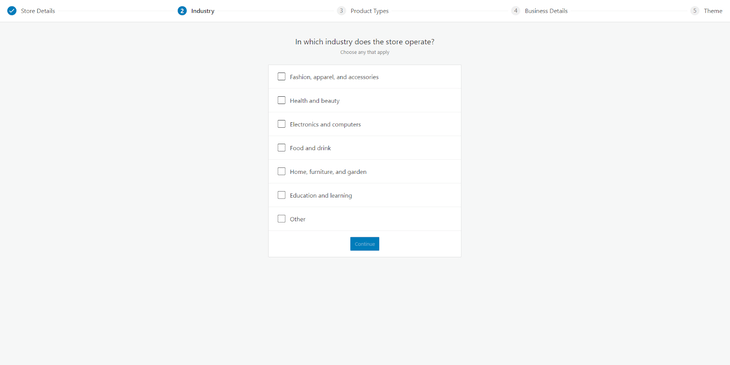
2. Select Industry for your Store
In the next step, select the industry of your store, i.e. what kind of products you sell.
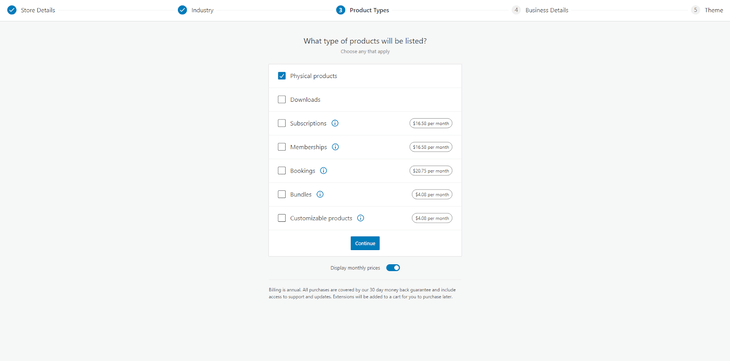
3. Select Products/Services Type
The third step is to select the type of products or services you are providing through your online store. The first two are free, others come with a fee.
4. Select Free Features
On the next screen select the options as shown below and then click on Free Features.
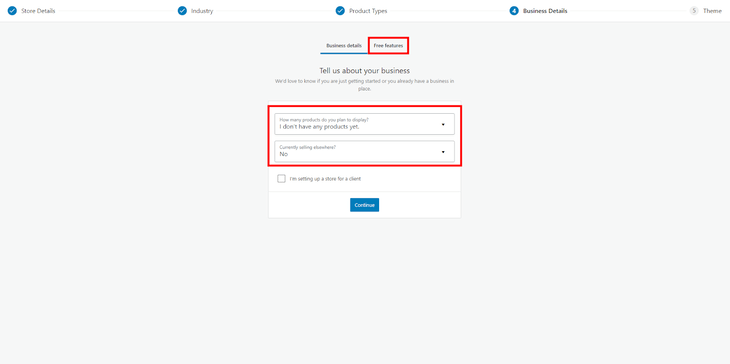
On the Free Features tab uncheck the Add recommended business features to my site check box.

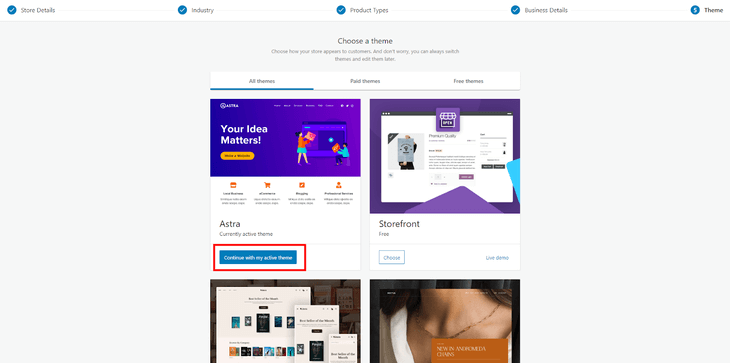
5. Continue WooCommerce Setup with Active Theme
Click on Continue and click on Continue with my active theme.
Now we have completed the basic setup of WooCommerce there’s one final set of steps we need to complete our online store.
6. Setup WooCommerce Payment Methods
For any business to grow you need to sell for a price, basic economics, right?
For taking the amount you are charging for your products we will need a payment interface where buyers can place their orders and pay via various payment methods.
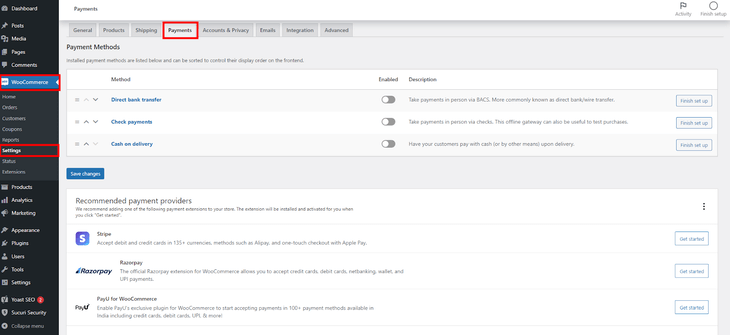
Here you can see various payment methods and select the one of your choice and convenience.
7. Configure Shipping Options
When you sell online, you will have to have a shipping method and maybe various shipping rates according to your and the customers’ region. To set up your shipping options go to WooCommerce → Settings → Shipping.
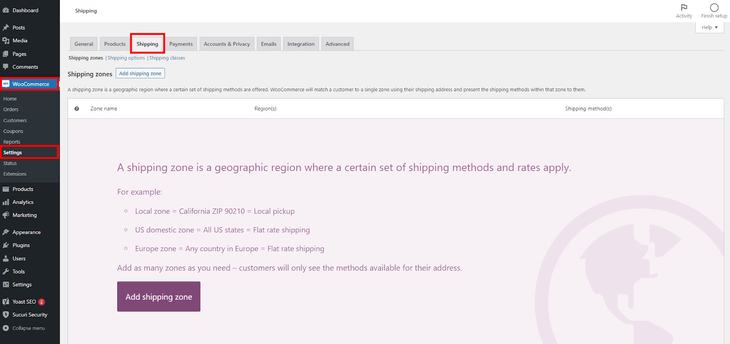
On this page click on Add shipping zone. Here you can create different shipping zones and add shipping methods.

Add a new shipping method, and click on Add shipping method.
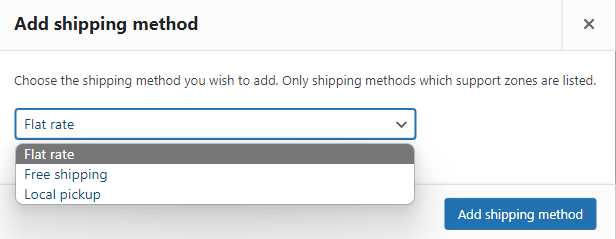
You can choose the type of shipping you want to provide your customers and charge them accordingly.
Step-8 – Adding Products To Your Online Store
The second last step to set up your online store is to add the products you want to sell.
1. Add New Product
To do this, go to Products → Add New. Here you will see a window like this.
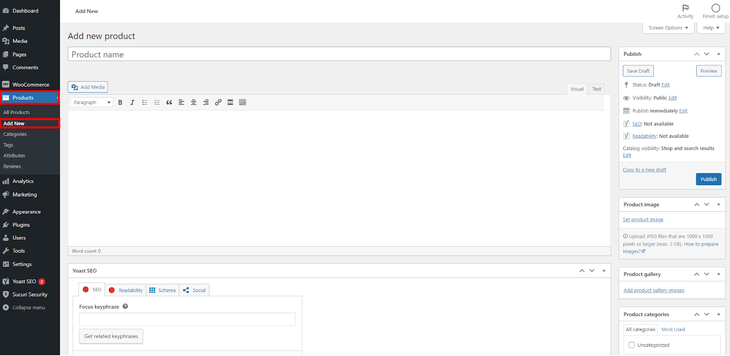
2. Add Product Title and Product Description
As you can see here you can add the title or name of the product and the product description.
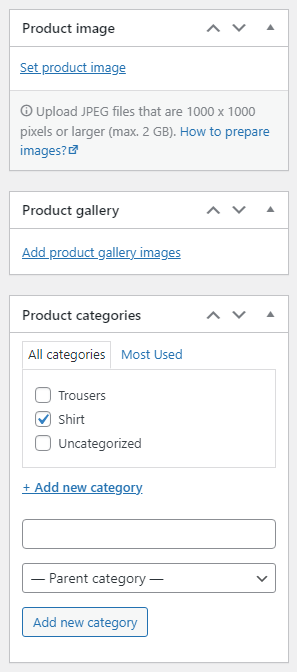
3. Add Product Image, Product Gallery, and Product Categories
Then on the right side of the add new product page, there are some more options like Product image and gallery. You can also select the category got that particular product.
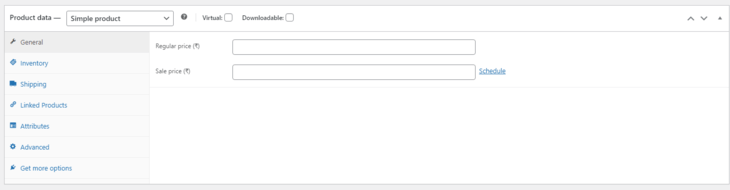
4. Add Product Price, Inventory Size, Shipping Information, and Linked Products
After that, You need to scroll down and here you can set all the properties of the product like Price, Inventory size, Shipping Information, Linked products to show as related products, and some other options also.
5. Optimize Your Product For Search Engines
This is all that needs to be done for adding a new product, but there’s something more to it. Remember we installed the Yoast SEO plugin.
Just above the last section, we discussed is the Yoast SEO section. Here you can fill out all the related information and keywords, slug, meta description, etc. to make your product more Search Engine Optimized so that people who never visited your store can also find you and become customers.
6. Publish the Product
When all is done, click on Publish to make your product live. After hitting publish you can check how your product page looks to other people by clicking on the permalink of the product.
And that is how you finish setting up your online store and list your first product.
Final Words
In less than an hour, you set up your online store. We hope this article helped you answer your quest on “How to start an online store?”
Now there no looking back, list more products, experiment around with the plugins and theme, and keep learning.